Wednesday, October 21, 2009

Announcing Book #3 in the Series--


It's now available for pre-order from Amazon. Go to http://tinyurl.com/ylors6d
Photo, Snap, Shot will be released in May in time for National Scrapbooking Month. Stay tuned for more details, as I am busy planning a "Kiki Lowenstein World Tour."

Thursday, September 17, 2009

Contest on Spotted Canary

Contest on Spotted Canary

It's up! You'll want to learn all about the new Spotted Canary Contest. You could win naming rights for a character in Book #3 of the Kiki Lowenstein Scrap-N-Craft Mystery Series.

Go to...http://tinyurl.com/lyru9n

And while you're there, check out what a super site this is for crafters. You'll find everything you need to put FUN back into your hobby world. Here's the site: http://www.spottedcanary.com

Why visit a craft site?

This isn't just any craft site. Most of them have a LOT of promotional information for their products and very little information with projects. However, Spotted Canary is a unique design, reflecting a different philosophy. It's goal is to be a world of information, of like-hearts gathering, for crafters. Yes, there are ways to find products, but that's not the PRIMARY goals.

In the months ahead, we'll be doing more and more activities with Spotted Canary, such as posting on their blog and adding articles. Additionally, they've agreed to help us in supplying prizes, and supplies for the many public appearances we make to promote Kiki Lowenstein.

So get involved now and watch us both grow!

Wednesday, September 16, 2009

News and Appearances

MINNEAPOLIS VISIT--Sept. 18-20, 2009

Joanna will be appearing at Scrapfest at Mall of America in Minneapolis to sign copies of PAPER, SCISSORS, DEATH (Book #1) and CUT, CROP & DIE (Book #2). Be sure to stop by the Archivers store at Mall of America, and visit me on Friday (September 18) from 9am to 1pm, and Saturday (September 19) from 9am to 1pm, on Sunday (September 20) from 11am to 3pm.On Friday night at 6pm, she’ll stop by Uncle Edgar’s Mystery Bookstore in Minneapolis to sign books. In the evening on Saturday, she'll stop at a crop at Scrapbooks Too, 10518 France Ave S, Bloomington, Minnesota.

ONLINE AT SPOTTED CANARY--Sept. 17, 2009, and every Monday for six consecutive weeks.

Join Joanna every Monday at 8am EST, starting on September 21, at www.spottedcanary.com in "The Cat That Ate the Canary" Forum. She'll be dispensing clues that may win you prizes or a chance at IMMORTALITY. Yes, you could win the chance to be a character in Book #3 of the Kiki Lowenstein Scrap-N-Craft Mystery Series.

FREDRICK, MD--Oct. 3, 2009

On October 3, Joanna will visit "In the Streets" at the Frederick, Maryland city-wide festival--details will be in our blog, but she's planning to team up with Queenie D, who runs Queenie D's Book Club Blog. There will be prizes!

INDIANAPOLIS, IN--Oct. 15-18, 2009

Meet the Killer Hobbies Blog Sisters at Bouchercon, October 15-18 in Indianapolis IN. (Go to http://www.bouchercon2009.com/ for registration details.) On Thursday, Oct. 15 at 9am, Joanna Campbell Slan will moderate a panel featuring Margaret Grace and Betty Hechtman from our blog http://www.killerhobbies.blogspot.com ! Then join us and learn the crafts we love so much: Visit the Bouchercon Craft Room on Thurs./Oct. 15 from 10:30am to 11:25am, Monica Ferris will teach "How to Make a Cross Stitched Bookmark"; 1:30pm to 2:25 p.m. Margaret Grace will teach "How to Make Miniature Flowers"; 3pm to 3:55pm Betty Hechtman will teach "How to Make a Crocheted Molly Pink Dishcloth." On Sat./ Oct.17, Joanna Campbell Slan will teach "How to Make a Scrapbook Page." Join us on Sunday, October 18 for the Book Bazaar--Joanna will be giving away copies of one of her Kiki Lowenstein Scrap-N-Craft Mysteries.

Sunday, September 13, 2009

Queenie D's Review of Cut, Crop & Die

It's not often you get reviewed by royalty. Queenie D gives her take on Cut, Crop & Die here http://www.book-club-queen.com/cut.html

Here's an interview we did together: http://www.book-club-queen.com/cut.html I must admit, I shared a lot more about my characters with Queenie than I have in the past. I'm curious to hear what my fans think about my future plans.

After we corresponded by email, I learned she and I are almost neighbors! So I'm planning to visit with her and her friends at the "In the Streets" celebration in Frederick MD on September 26. Stay tuned for details.

On Thursday at 8 a.m. EST, check out the forum at http://www.spottedcanary.com/ I'll be announcing details of a new contest where the winner gets to name a character in Book #4 of the Kiki Lowenstein Scrap-n-Craft Mystery series.

I'm heading out this Thursday for Scrapfest at Mall of America, Minneapolis. I'll be signing up at the Archivers store on Thursday, Sept. 18, from 9 a.m. to 1 p.m, on Friday, Sept. 19, from 9 a.m. to 1 p.m, and on Sunday from 11 a.m. to 3 p.m. I'll also be stopping in at Scrapbooks Too for the evening crop Saturday night, as well as dropping by Uncle Edgar's to sign books. For details, visit http://www.booktour.com/ and put in my name.

Meanwhile, I'll try to get my Fall 2009 newsletter out to all of you. Be sure to sign up at my website http://www.joannaslan.com/

Have a great fall!

Tuesday, August 25, 2009

Robert Redford Casserole sent by Sue Ellen Harrell

Jone’s Chocolate Delight
(Or Robert Redford or Better than Sex )
1 stick of melted butter
1 ¼ c. flour
1 c. chopped pecans or walnuts
1 8oz. pkg. cream cheese
1 c. powdered sugar
1 9 oz. container of Cool Whip
2 pkgs. of chocolate instant pudding
3 c. milk

Preheat oven to 375 degrees; blend together butter and flour with a fork, mix in nuts and spread evenly in 9 X 13 pan. Bake for 20 minutes or until golden brown. Let cool.
Blend cream cheese and powdered sugar and ½ of Cool Whip. Spread on cooled crust. Chill in refrigerator.

Prepare two packages of instant pudding; reducing milk to 3 cups. Spread on top of cream cheese layer.

Refrigerate ½ hour. Top with remaining Cool Whip and sprinkle with nuts, if desired.

Applesauce Casserole by Karne Skocik

Applesauce Casserole

25 oz. jar applesauce
1/2 cup brown sugar, packed
1 tsp. cinnamon
1 cup biscuit baking mix
1/2 cup sugar
1/4 cup margarine, softened
In a medium bowl, combine applesauce, brown sugar and cinnamon. Spoon into a 1 1/2 quart casserole dish sprayed with non-stick vegetable spray. In a small bowl, blend together baking mix, sugar and margarine until crumbly; sprinkle over applesauce mixture. Bake, uncovered, for one hour at 350 degrees. Stir before serving. Serves 8-10.
Mmmmm. Tastes great hot or cold.

Wednesday, August 5, 2009

How to Do a Design Transfer

This is a cheap, fun way to transfer almost any simple image. I use it to start many of my customized drawings, and I mentioned it in my latest book, Cut, Crop & Die.

Basically, you are creating “carbon paper” on the back of your image. Here are the steps:

1. Print out your image on a piece of paper. The thinner, the better. The simpler your image (that is, the fewer the lines and the less complexity it has), the better.


2. Turn over your image onto the WRONG side. Using a graphite pencil (#2 lead or softer is best), color the paper on the WRONG side of the image. I like to make strokes one way (say from upper left to lower right) and then the other way (upper right to lower left).


3. Flip your original over to the right side. Tape it down to a new piece of paper. Copy over the lines of the original with your pencil. This will transfer the graphite on the back to the new paper.


4. Tada! You will have the original and a much, much lighter pencil version of the same. Now you can correct your new version—you’ll always have a few lines that are too thin or wobbly. But you have transferred your design. Good on you!


Okay, now that you know how to do this...here's a tip: You can also transfer any image onto DARK paper by using the same process with one change. Instead of a regular lead pencil, use a white lead pencil like you find in a box of colored pencils. Heck, you could even use a yellow pencil or any pastel. It might be a little harder to lay down the coating of lead, but it does work!
Enjoy! And remember to respect copyrights and just use art that's copyright free.


Thursday, July 16, 2009

How to Make a Paper Bag Album

Start with a stack of paper bags, folded shut.
Stack them alternately, open end, closed end. As seen below:

Now, sew them together through the middle axis, or alternately you can staple them together. I used a big bulldog clip to hold mine together and punched holes in them with my Crop-A-Dile. Then I sewed them together. Finally, I laced paper punched flowers through the holes.
Fold your album like a book, with the sewing line as your binding (as in a book.
Decorate the cover. Put a clear adhesive laminate film over the cover for stability. (Contact Paper will do fine.)

Decorate the inside pages and enjoy!


Yet Another Page Kit

Nuri Wallace is offering cute page kits at Etsy. I think this one is really adorable...

http://www.etsy.com/view_listing.php?listing_id=27754606

I'm curious...how many of you buy page kits through the Internet? After looking at my new home in the Washington DC area, I've decided I'll be doing a lot more shopping online. I couldn't find a LSS...much to my disappointment. I thought about saying, "I won't move here! There are no local independent scrapbook stores nearby!" But gee, that seemed a little rash.

There are two chains--Michaels and A. C. Moore. I like chains, but I love the individuality of independent stores as well.

Any thoughts?

Wednesday, July 15, 2009

Page Kits


My friends at The Scrapbook Tree have cute page kits available for mail order. Reasonably priced, too. This is a sample of how you can make one of them up. Check the rest out at


Tuesday, July 7, 2009

4th of July Page Kit Now Available--


This now available from www.youpublish.com/joannaslan Along with journaling tips and art.
You can download this file for free for a limited time.

Wednesday, July 1, 2009

The Answers to Your Questions

I love your mail, and recently, a lot of you have been asking me questions after reading Cut, Crop & Die:

1. Will Detective Chad Detweiler appear in Book #3?

Yes. But I won't tell you if Kiki and Detweiler get together. My lips are sealed. Tell me...do YOU want them to get together?

2. What happens with Sheila and Police Chief Robbie Holmes?

Um, it's complicated. Sheila is definitely in love, but she's also a very inflexible person, isn't she?

3. Will Kiki stay in St. Louis?

As some of you know, my husband David and I are moving to Washington DC.

But Kiki will stay in St. Louis. At least for the time being. That said, I really think Kiki should
* go on a scrapbooking cruise
* or a scrapbooking retreat
* or to a big scrapbooking convention, don't you? Let me know! Write me at joannaslan@aol.com

4. Will Paper, Scissors, Death and Cut, Crop & Die be available on Kindle?

My publisher has told me they have submitted the books to Amazon for inclusion on Kindle. However, it's up to Amazon to decide how FAST they put the books on Kindle. I suggest you let Amazon know if you'd like them to hurry up.

5. Will Paper, Scissors, Death and Cut, Crop & Die be available on audio books?

We're working on this, but it's not going to happen any time soon. (Probably not in 2009.)

6. Why are there two covers of Paper, Scissors, Death shown on some bookseller sites?

Because one is the large print version.

7. When will Book #3 in the series be released?

In Spring of 2010.

Cute Coaster Album


How to make your own coaster album:


1. Decide which coaster will be your first, second and so on in the album chain. Also decide what will be your album "cover." You might want to play with your shapes to decide this!

2. Now decide how you will attach your album "pages" (coasters) together. This will help you determine what sorts of holes you'll need and where they'll go. You might even wish to draw a small thumbnail sketch of your album so you remember where your attachment points will be.
3. Cover your coasters with paper. Again, think in terms of pleasing patterns! I chose to alternate pink and green. Also, think about where your photos will go. I decided my cover will not have a photo. All the inside pages will. On the green page with the big heart, the photo will go under the heart. On the other pages, the photos will go above the words "dreams" and "love."

4. Do the same for your back sides. (Uh, of the album! You know what I mean!)

5. If you decide to have an image extend beyond the edge of the coaster, remember it will show its reverse side on the reverse side of the coaster. For example, next to my cute little tree, I have a "sun" with a heart in it. The reverse of the "sun," the round shape, also shows when I flip the album over. So I had to cover both sides of the "sun" with paper. (You can see what I did by looking above at the album, the far left coaster shows the backside of the "sun.")

6. Punch your holes, add ribbon. Enjoy!


TIP: You'll notice that the second coaster from the left above doesn't have flat paper. I should have spread my glue across the center of the coaster rather than just around the edges. My bad.


Paper Piecing Tips


Paper piecing is fun and easy. Over the years, I've gotten better at it. Here are some of my best tips--and I invite you to share yours as well!


1. Make two copies of your pattern--always. That way, when you cut the pieces apart, you can tell what goes where.


2. Find patterns by going to "google," clicking on images, and putting in "line drawing + WHATEVER." Of course, you'll change the word "WHATEVER" to rabbit, deer, or whatever you want. Also try "cartoon" instead of "line drawing." Now, you don't have to limit yourself to simple drawings, but it does make it easier.


3. Use Herma's Dotto repositional glue dots on the back of your pattern to adhere it to the paper you want to use as a base. I always cut out the biggest part of the pattern first. You don't want to be piecing together small bits to make the overall shape of your image. For example, with the deer above, I cut out the whole body from brown paper. Then I peeled off what was left of my pattern, stuck it on the lighter paper, and cut those pieces out next.


4. Remember that your paper piecing won't really look great until you add pen or pencil and chalk. For my deer, I filled in the inside of the ears and his mouth with white pen. Then, I put a thin layer of pink ink over the white pen. I also used the white pen on the black of the eye, around the iris of the eye, and on the nose.


5. Use chalk as your best friend! It adds tons of definition and totally melds your pieces together. Remember that dark colors are the shadows or the receding portion of an image. Light colors are for the highlights, for areas that are nearest you.


6. Touch areas you wish to lighten with a rolled up eraser, the gummy kind, to lift away chalk. Since chalk can be hard to control, the type of gummy art eraser you can manipulate is perfect for getting into small areas. You don't have to scrub your paper. Just touch down the eraser.

"Turn Up the Heat" CONTEST and Recipe!


Jessica Conant-Park and Susan Conant write a fun series and offer a great online newsletter called Food Fiction. So I asked Jessica to share a summer recipe--and two copies of Turn Up the Heat--
Thank you Joanna for having me stop by!
I write the Gourmet Girl mystery series that’s set in the Boston restaurant scene. I think of the series as a cozy, culinary, chick lit mystery read… sort of Julia Child meets Bridget Jones meets Janet Evanovich. (Well, fine, I’ll admit most of authors would like to be compared to Janet, but, hey…)
My heroine Chloe Carter is a graduate student, struggling her way through social work school, and dating a charming and talented chef. There are lots of restaurant insider details (many courtesy of my chef husband and his pals) and recipes at the end of the book (also from my chef and from other chefs who generously contributed to the book.) I also put out a monthly newsletter, Food Fiction, with my pal Michele Scott (of the wonderful Wine Lovers series) and we’re having a blast welcoming guest authors and cooks. We’d love to have you sign up and promise to deliver delicious recipes, book and author news, and awesome contests!

Summer is supposedly upon us, although it’s been doing nothing but pouring here in New Hampshire recently. But, food-wise, I will not be discouraged. Tomato season will arrive, and there are already some wonderful tomatoes popping up in the stores and at farm stands. My plants haven’t had nearly enough sun yet, but I am looking forward to the day I can go into the backyard and pick my own. And despite the rain, we’ve been doing plenty of grilling at home—everything tastes better on the grill! I am a huge fan of fresh oregano and have two very large plants outside that I pick from often. It’s so easy to grow and survives brutal winters, so even if you have not the slightest hint of a green thumb, you can throw a plant in a pot, water it when you remember, and have it flourish.

The other night I tossed together a very nice (and easy!) pasta dish. I roughly chopped up some onion and beautiful tomatoes, tossed them in olive oil, salt, and pepper and cooked them briefly in a cast iron pan on the grill. (If you don’t have a cast iron pan, you can use a fajita pan, or even skewer the veggies.) I let them cook just until the onions started to soften a bit and the tomatoes began to release some juices. Mix this with your favorite pasta (I’m a tagliatelle fan), more olive oil, a big handful of freshly chopped oregano (stems removed, please!), and some Parmesan. I love this kind of dish at room temperature, and if you let it sit out for an hour before eating, the pasta will really soak of some of the delicious flavor. As the season goes on and more and more gorgeous produces becomes available, we’ll all be able to cook very simply by relying on the rich flavors of the season. Enjoy!
CONTEST DETAILS
Email me (Joanna) at savetales@aol.com and put JESSICA in the subject line. Be sure to include your name, postal address, and phone number. On July 9, I'll select two lucky winners from the entrants. I'll announce the winners' names on the Inkspot Blog (http://MidnightWriters.blogspot.com) on July 10.

Monday, June 8, 2009

News and You Could Receive a Free Album Kit

Fi W. is the winner of a copy of The Diva Runs Out of Thyme.

Whew, it took me a while to pull a winner as it's been CRAZY here, but the book will be off in the post to Fi, along with many hugs.


FREE GIFT OFFER


Here's another offer I'm making:

If you post a review of Cut, Crop & Die on Amazon or Barnes & Noble, let me know. I'll send you a little gift, a complete album kit from ANW Crestwood. It's adorable in shades of lavender and rose, with paper and stickers.

Just email me at joannaslan@aol.com to tell me your review is up, and share your postal address, then I'll pop one in the mail to you as long as supplies last. Please put REVIEW IS UP in the subject line!

Monday, June 1, 2009

Savoring the Memories

This week the “For Sale” sign went up in our front yard. A small caveat, “Coming Soon!”, warned folks we aren’t quite ready for prime time and looky-lou’s. What a bittersweet time this is. My son is home from college, leaving half-empty bottles of Gatorade around the house, getting calls at all hours, and constantly asking what there is to eat. My husband is distracted by phone calls from real estate agents, vendors, music institutes, and would-be employees. My sisters phone me with news about my mother’s tests, indicating she has cancer of her lungs, and how we are in a holding pattern until the doctors test her (some more) to decide how to proceed. I sit for hours winnowing through boxes of old documents, speeches I wrote for the executives of Diamond-Star Motors, ad copy I created, ad campaigns and focus groups that I ran, and bits of books and articles which never went anywhere.

On Saturday, David and I finished cleaning our newly remodeled garage. First I photographed the growth chart we made with black marker on one wall. We used that space to note Michael’s first bubble with bubblegum, the one and only baseball game his team won, and finally, “College Bound” which we stopped the car to add the day we set off to take him to school. Grumbling, he agreed to be pulled from the backseat, to stand against the wall, and to be measured against other years’ growth.

The next occupants of this house will find a freshly re-done garage, now insulated, dry-walled and with a painted floor. Plus a new built-in set of shelves. But no growth chart.

And of course, our house will soon be nearly empty of clutter. We tossed enough stuff to fill our SUV twice with items to take to Goodwill. I rummaged through my son’s old Beanie Babies, his crib bumper, and a doll that belonged to my mother. Those things I kept.

When the garage was done, we moved to work in our basement. We have 4,200 feet of livable space, with a lower level walk-out. On this walk-out level are three rooms: my office, a spare bedroom/storage area, a big screen tv viewing room, plus a large open area that used to have a pingpong table, weight set, pool table and pinball game. I worked my way through old storage boxes, looking sadly at Michael’s fingerpainting efforts, his cards to me saying “Mom, I love you more than Dad does!” and photos of pet chameleons which never lived long. We found an old jewelry box that belonged to David’s mother. I insisted that rather than dump the contents we stop and take it to a jeweler. We did. Good thing. There was an old garnet pin inside, which easily could have been taken for costume jewelry. David also unearthed a beautiful strand of pearls, larger and creamier than the one he bought me years ago.

So far we’ve replaced our roof, added bigger gutters, painted the front door, tiled two areas formerly linoleum covered, cleaned the carpets, had paint dings fixed, replaced the old laundry sink I hated with a sink/cabinet combo. I took a break while writing this for David to pull three ticks off of me. Ticks I am sure found me yesterday while we were planting lemon yellow marigolds and red salvia around our mailbox. Or while I planted the window boxes that sit merrily on the banisters of our deck.

About the time I planned to take a break and write, the real estate agent called. She had a young couple who were driving around and asked to see our house. The couple has three kids. David, Michael and I played “beat the clock” finishing up getting the house presentable.

As the couple walked through, I had to restrain myself. I wanted to tell them, “You think this is just a house, but it isn’t. It’s a place where a happy family has lived. A place where we raised my son. Where we laughed and loved and played together. It could be happy for your family, too.”

But I didn’t.

Tuesday, May 26, 2009

CUPCAKES and THINK PINK


Yum, yum, yum.


I drew and colored the cupcake embellishment, the journaling box and the page title. You can get a copy of the art file by emailing me at SAVETALES@AOL.COM Just put CUPCAKE in the subject box.


We try to get these files out as quickly as possible, but after our newsletter has been out two weeks or more, we don't check that mailbox (savetales@aol.com) as often as we probably should. So...if you want it, tell me FAST.


Here's another set of images we'll send along with the CUPCAKE file--The doodling for THINK PINK which is above CUPCAKES. (For some reason, Blogger refused to let me move THINK PINK below CUPCAKES. Sigh. Life is like that!)

Asparagus and Mushroom Linguine--and a Chance to Win a Copy of Krista's Book!


Krista Davis was kind enough to share the wonderful recipe below.


To win a copy of her Agatha Award nominated book The Diva Runs Out of Thyme become a follower of this blog. That's right...just CLICK the FOLLOW button. On Monday, May 31, I'll post the name of one lucky follower. That person must then email me with her postal details. How simple is that?


Okay, now back to Krista--

This is a delightfully simple recipe that can be served as a side dish with a grilled meat. It can also be served it as a main course for vegetarians, and if you omit the heavy cream, it will suit vegans.


Add a green salad and dinner's ready. Makes three large servings or four normal ones. If you prefer a hotter dish, add crushed red pepper.

Asparagus and Mushroom Linguine


2 tablespoons olive oil
1 bunch asparagus, washed, with the tough ends snapped off
1/2 cup chicken stock
8 ounces white mushrooms
1 cup shitake mushrooms (about six large mushrooms)
2 cloves garlic, chopped
3 tablespoons heavy cream
salt and pepper to taste
cooked linguini
Parmesan cheese

Cook pasta according to instructions on package.

Cut the asparagus into one inch pieces and slice the mushrooms. Heat the olive oil in a large skillet. Add the asparagus and saute over medium heat for about four minutes. Add the chicken stock, the mushrooms and the garlic, stirring occasionally. Cook until the mushrooms begin to soften, then add the heavy cream. Season to taste with salt and pepper. Let simmer three minutes to blend.

Drain the pasta and place a serving on each plate. Spoon the asparagus mushroom mixture over top of the pasta. Sprinkle with parmesan cheese and serve!

Paint Color Sample Birthday Card


Here’s a fun way to recycle those paint color strips you pick up at the hardware store.
(Okay, I know the borders are hard to see...)

1. Cut a 12” x 12” piece of paper in half.
2. Score a 1” x 6” piece along the bottom. (Tip: I use the channel in my personal trimmer for this. I line up the paper with the channel, but instead of running the cutting blade along the channel, I use my bone folder and make a groove.)
3. Make another score 5 ½” from your 1” score. (The card will now have a fold line at 5 ½” and 1”. Fold the piece like a matchbook.
4. Along the bottom WITHOUT the 1” fold, punch out 4 flowers. Center a paint strip behind the flowers, cut off the excess, and tape it down. Use a pen to trace around the flowers for detail. Punch one flower out of the paint strip.
5. Write Happy Birthday and attach the flower.
6. Now, fold the piece like a matchbook with the PLAIN side out. Address goes on the plain side of the card.

Gift Bag Wedding Album or Favor


In Paper, Scissors, Death, my protagonist Kiki Lowenstein creates custom photo albums as “favors” for a bridal shower. That’s lots of fun, but not everyone has a wealthy mother willing to pay for such an extravagant gift. If you are invited to a wedding, here’s a budget minded way to create a lasting memory for any bride! These also make great "favors" for the bridal party.

1. Untie and remove the ribbon handles of a 5” x 6” gift bag. Keep them for later.

2. Carefully cut off the bottom of a gift bag. (Tip: The bottom is usually reinforced with cardstock. Tear that out first. Then, pry up the folds. Flatten those out and cut them off.) Now cut apart the bag so you have two rectangles, 5” x 6” each. These will be your album covers.

3. Cut two "liners" to hide the “wrong” side and to reinforce your two covers. (Tip: Make your liners a complementary color of paper. Run a gold pen around the edges of your liners before you adhere the liners to the inside of the covers.)
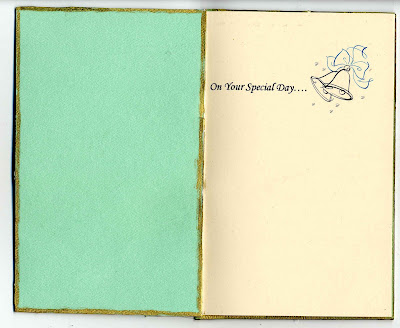
(Above is the inside of the project.)

4. Go to the clip art section of MS Word and find a wedding image you like. Create inside pages for your album by using clip art. (Tip: When assembled, your album cover will fold open. Any image on your inside pages must fit inside. So, for my book, the inside page had a 1” left hand margin that I kept free of words and images. That margin was bound into the spine of my book.)

5. Assemble your book. The holes where the ribbon handles were are now the holes for your brads! I used heart-shaped brads and backed them with flowers. (Tip: Punch holes through your inside pages that are in line with the holes on your covers.) Add cover art if desired. (Tip: Reprint your clip art and use it in a larger version on your cover. I used the ribbons from the handles to accent the wedding bells.)

Sunday, May 24, 2009

Great Free Memorial Day Journaling Box

Here's a terrific free journaling box perfect for Memorial Day and honoring our servicemen and servicewomen.

http://freescrapbookingsupplies.blogspot.com/

You know, Mary Englebreit said it best when she was talking at the Scrap St. Louis event. She marveled about there is so much great free design work on the Internet! And this journaling box is just one more example of that!

Friday, May 22, 2009

Sales of Cut, Crop and Die to Benefit Homeless Great Danes


Once again, MAGDRL (the Mid-Atlantic Great Dane Rescue League) is teaming up with mystery author Joanna Campbell Slan for a special fundraiser.


Joanna's new mystery, "Cut, Crop & Die" features a rescue Harlequin Great Dane named Gracie and Joanna has agreed to donate 50% of the sales price to MAGDRL during this special promotion when you order your books through the link below. The book has received great reviews and, in addition to a Great Dane tie-in, it's about scrapbooking, so whether you love mysteries, scrapbooking, or Great Danes (or all three!), you'll enjoy the book. From now until 7 June, order a copy of the book through the link below and MAGDRL benefits. Joanna will personally sign special bookplates for the book(s) you order, making them a perfect keepsake for you, or for gift-giving. Your book will be shipped to you, with your signed bookplate (if you want one) the week of 15 June.For more information, and to order your book(s), see this special page on the MAGDRL website. http://www.magdrl.org/bookFundraiser.htm


PLEASE REMEMBER -- When you order, put what you want as an inscription on the bookplate in the comments section of the order. If you don't want a personal inscription, you'll get a bookplate with Joanna's signature only.

Monday, May 18, 2009

Claire Hanover's Tips for Creating an Effective Gift Basket


Kiki Lowenstein has invited me to give her blog readers some tips about making effective gift baskets. I can tell you that after the adventures I had in Beth Groundwater’s To Hell in a Handbasket, I am ready to return to my basement workroom and just create gift baskets for a while!

One of the gift baskets I put together during that time was a sympathy basket for Angela Contino, whose daughter was killed on a Breckenridge, Colorado ski slope. Here’s what I remember of a conversation between my daughter Judy and me about that basket:

“Thank you cards and a pen won’t fill a basket,” Judy said. “What else do you have in mind?”

“Some soothing things, like scented candles or a book of uplifting poems. Are the Continos religious?”

“Catholic. Nick doesn’t go to church much, but his mom attends mass every Sunday.”

“Okay, some religious poetry or a book about taking your grief to God, or something like that. And some soft music. A gift basket should have something for every sense—taste, smell, sight, touch, and sound. What kind of music do Nick’s parents enjoy?”

Judy thought for a moment. “Classical, I think.”

“Good, I’ll ask at the stationary store where we can find some nice CDs.”

This conversation covers two of my most important guidelines for creating gift baskets that will be appreciated and remembered. The first is to really know the recipient’s interests and tastes. That way you can tailor the basket’s contents to match, the same way I took into account Angela Contino’s Catholic religion and enjoyment of classical music. The second guideline is to include something for all the senses. The music was for Angela’s ears, the scented candle for her nose, and later I found some soothing chamomile herb tea for her mouth.

I usually pick one main color and two complementary accent colors for each gift basket. In this case, I found a dyed wicker basket that matched the colors in the Contino ski house living room so the basket could be used to hold reading materials later. They have a dark green leather sofa and stone-inlaid coffee table and fireplace, so dark green, gray, and brick red were the colors woven into the basket. I also used those colors for the decorations—a fancy bow and dried flowers, and for the lining, a soft, woven wrap scarf that could be used to warm a grieving woman or to drape decoratively over a chair later.

The basket couldn’t take away Angela Contino’s grief, but it let her know that we were thinking of her. It may have brought her some comfort, and it contained useful items such as the pen and thank you cards that she could use in the days ahead. And, while delivering that basket to the Contino home, I happened to discover an important clue to the mystery of who killed Stephanie and why!

With gift baskets, it is truly the thought that counts. I encourage everyone to put together gift baskets for special occasions, and don’t worry about it looking amateurish. To read the rest of my Tips for Making Perfect Gift Baskets, visit the Articles page of Beth Groundwater’s website at http://bethgroundwater.com/ . Also on her website are reviews, excerpts, discussion questions, and more information about her books, a schedule of her appearances, and the full schedule of her blog book tour.

I’d love to answer here any questions you have about gift baskets, and Beth will be available, too, to answer questions about her books and writing.

You can purchase To Hell in a Handbasket and A Real Basket Case by ordering them at your local bookstore, or by going to one of the following links:

- http://search.barnesandnoble.com/booksearch/results.asp?ATH=Beth+Groundwater- http://tinyurl.com/Beth-Books-at-Amazon
**

Contest announcement:

If you comment on this article or ask Claire or Beth a question today, or comment on Beth's blog (http://bethgroundwater.blogspot.com/) anytime during her May blog book tour, you will be entered into a drawing for an autographed set of both books in the Claire Hanover gift basket designer mystery series: A REAL BASKET CASE and TO HELL IN A HANDBASKET. Good luck!

Tuesday, May 12, 2009

The Winner

Sandy B. from Monroe City IN won our autographed set of Best First Novels from our Malice Competition. Congrats to you, Sandy!

Thursday, April 30, 2009

When Your Project Just Refuses to Co-Operate!


Since this is the blog where I share with my scrapbooking buddies, I can give you the straight scoop--
I agreed to do a page to be auctioned off Malice this weekend. The work goes to help the John Gildner charity which works with severely emotionally disturbed adolescents.
I decided to duplicate the page as I made it. In part, so I could test ideas on Page 1--and have a fall back to Page 2 if things didn't go as I wanted. Here's an admission: One of my favorite portions of the Design Team pages for ScrapBook inspirations is where the artists tell you what they tried that failed. It's very inspiring to think that their beautiful creations didn't just come together easily. At least, it's inspiring to me!
So I started work by pulling out all the papers I had in the official Malice colors. Then I changed the color on an orangish piece of paper because I liked the skull--very Malice since it's a gathering of mystery lovers. And finally, I created my own papers.
Along the way I had this super idea to add a small glass bottle to represent the poison that Dame Agatha Christie (who is the mystery author who spawned the genre that Malice honors) worked with. All was cool--until I tried to put the finished page into the frame I'd purchased. It was a "no go," because the small glass bottle caused the frame to sit lopsided. I fussed and fumed with it. Finally, I reverted to using Page 2--to which I added the customized flower and the AC initials.
Inside the small album is room for 8 photos (4" x 6" size). The cover of the album is sewn with sequins sprinkled throughout. The papers were customized and colored just for this, and the "not everyone's cup of tea" paper was custom made. The upper right with its overlapping letters pays homage to Agatha Christie's many books. The three red drops of blood lower right are in homage to the Killer Hobbies blog in which I participate. The tea bag on the left has glitter "inside." Agatha's portrait was sewn on by hand. The name of my book--Paper, Scissors, Death--appears on the page.
I'm also offering to review three chapters of someone's manuscript as an auction item.
Last week, the naming rights to a character in Book #3 of the Kiki Lowenstein Mystery Series fetched in excess of $500 (we think it was $750, but we can't confirm that yet) for the Guardian Angel group here in St. Louis.
I'd love to hear about your adventures with pages that just didn't work as planned!

Saturday, April 25, 2009

The Wisdom of Mary Engelbreit: How to Live a Creative Life


All of us in the creative world have role models and heroines. One of mine has long been Mary Engelbreit. Last Thursday, thanks to the nice folks at For Keeps Sake Scrapbooking Superstore, I had the chance to finally meet the woman whose career I've followed with admiration.

I didn't think to take notes...which is unusual for me. I was too stunned, to tell you the truth. I figured she would be distant from all of us. She's a superstar. I didn't expect her to be approachable. But she was.

Mary made a short presentation and took questions. I'll try to share what I remember:

* She started by saying that if you choose to make a living of your creativity that you need to give up control. Her point was that there will be ups and downs, high-points and disappointments.

* She owes so much of her start to the support of her parents. As a child, she came home from an older friend's house where she saw her first art studio and announced to her mother, "I need my own studio." So her mother turned a closet into Mary's work area. "It was about 120 degrees in there," says Mary with a laugh. (Anyone who's lived through a summer in St. Louis can understand exactly what that must have felt like.)

* Which led to her advice, "Surround yourself with supportive people." And if the people around you aren't supportive? What if you have a boyfriend, best friend, whoever and that person can't share your vision? She said, "Get rid of them." (And let me say that this was the only time in her presentation where Mary seemed cut-and-dried. She said this with such utter authority that you knew she was speaking both from her heart and from experience.)

* I asked her how she handled career set backs. She said, "You can be upset about them. For about a week. That's it. Then...I always think, 'Okay, now I can do something else with that time.' You can't get bitter."

* I can tell you that she's a lifelong learner with a total lack of pretension about her skills. She mentioned at one point that she's unable to do illustrations that are representative art. (In other words, she can't draw one of her people and make that person look like someone living.) When she learned that you can use the blending tool of a Copic pen to lift color, she immediately asked Nancy (who teaches Copic marker use at For Keeps Sake) to come to her studio and give her a lesson! "I didn't know that," she marveled about the pens. "Hmmm."

* She draws for five or six hours a day. Once in a while, she doesn't want to work on her art. But, when that happens, she says, "Deadlines are great for inspiring creativity." After she gets started, she "gets into the drawing." She starts with pencil sketches and works to get them just right. ("I wish I could just do pencil sketches," she says with a sigh. But she knows her audience loves her sense of color.) After the pencil drawing is perfect, she goes over it with ink. Then she lays down color with markers. Finally she goes over the markers with colored pencils.

* I asked her if she ever made a mistake with the colors she chooses or whatever. "In the beginning," she says with a half-smile of remembrance, "there was a lot of throwing and stomping around. Now...I see the finished product in my mind. Besides, things can always be fixed with computer." (But she quickly admits she knows nothing about computers. She does have someone who works with her who is an expert.)

I've asked if I can come take Mary and her assistant Beth to lunch. Stay tuned!

You know, I wore ME colors to the event and a special pin that I thought she'd like. By golly, she honed right in on the pin....did my heart do a flutter-kick or what?

PS Does she scrapbook? She hesitated. She looked at us. We looked at her. Finally she said, "Uh, no. But I sure own a lot of scrapbook paper! And I know I should!"

Thursday, April 16, 2009

Vintage Baby Embellishment

Here's a cute vintage embellishment of a naked baby on a blanket.

http://freescrapbookingsupplies.blogspot.com/2009/04/vintage-baby-scrapbook-embellishment.html

It's definitely not the Gerber baby, but it sure would look nifty on:

1. The cover of a baby album
2. A greeting card--why not add the phrase "Oh, Baby!"
3. A collage or altered book

Hmmm. I can feel my creative juices flowing...eek! and I have too much other work to do to stop and create! What's a busy girl to do?

Tuesday, April 14, 2009

Spring and Easter Patterns

My friend Rebecca Ludens posted these fun paper piecing patters at Scrapbooking About Com:

http://scrapbooking.about.com/od/freepatterns/ig/Spring-Paper-Piecing-Patterns/?nl=1

You Inspire Me!

Yes, it's true. The notes, the comments, the responses I get keep me going. I imagine that some of you think this is a one-way street: I write and that's it.

Nothing could be further from the truth. YOU and YOU and YOU are why I write. I wake up in the morning thinking about you and how to reach you, how to get my books into your hands, how to offer you more than just a bunch of pages with a story typed on them.

Here are some ideas I'm noodling around:

1. I'm working with a group here in the St. Louis area to have a big inaugural launch of the Kiki Lowenstein Fan Club. It would include a weekend crop with lots of prizes, buttons that say "Get Kiki", and fan club membership cards. Of course, being a crop there has to be food, fun, classes and prizes.

2. I've written one Kiki short story. I'll probably send it off to a magazine first, but now I'm itching to write OTHER Kiki short stories. I have to decide the best way to share these--if my publisher agrees that I can.

3. I'm working on a blog tour. What scrapbooking blogs do you like best? What chat rooms?

4. I'm going to post scenes from Paper, Scissors, Death on my website.

5. I'm working on getting more tutorials onto the website--and making it easier for scrapbookers to find scrapbooking info.

6. I'm working on an online writing class--Writers Online Workshops has given me back the rights to my class "How to Get Started (Quickly) in Scrapbook Journaling" because they've made some changes.

7. I'm working on formatting all my old Graceful Bee columns into an e-book that I'll give away with the purchase of two books--Paper, Scissors, Death and Cut, Crop & Die.

Any other ideas for me? What would you like for me to do? Send me a GREAT idea and I'll come up with a gift for you!

Okay, back to the new book I'm writing! Ta-ta for now!

Joanna

Monday, April 13, 2009

The Bookmarks Have Arrived!


Yippee!


The new bookmarks have arrived for Cut, Crop & Die--Book #2 in the Kiki Lowenstein Mystery series. I had them designed especially to look like the FIRST bookmarks so you could collect the set. (I've already written Book #3, and we're on pace for #4, so the sky's the limit.)


Aren't they gorgeous?


Here's how to get yours...PLUS a signed copy of the galley for the first book. What's that? A galley? It's the original proof an author uses to make corrections. There's only one in existence per book, but I'm willing to sign one of my pages and give it to YOU.


Here's what you need to do:


Send a STAMPED, self-addressed envelope to Joanna Slan's Bookmarks and Galley, 12033 Dorsett Road, Maryland Heights, MO 63043. Be sure to let me know if you want the galley pages autographed to someone in particular!

Sunday, April 12, 2009

Easter Album Part II


Want a template for this big egg and the hand-colored bunny? Email me at savetales@aol.com and put BUNNY in the subject line. I'll also throw in the pattern for the muslin bunny show on other panels!


FIRST INSIDE PANEL

Somehow I picked up a water glass coaster of chipboard from a Westin hotel where I stayed--and it was shaped like a BIG egg. You can get a hand-drawn template of your own by emailing me at SaveTales@aol.com and putting BUNNY in the Subject Line. I cut two pieces of paper using the egg as a template. I punched a 2" diameter hole in one of the papers. Behind it I layered a piece of clear plastic (acetate, I presume) from packaging. Then I prepared my "scene" on the other piece of egg-shaped paper. I layered this bunny embellishment and punched out leaves, etc. Finally, I assembled the whole shootin' match.

Tip: You can use the foam area between the Pop-Dots. Just cut it to size, as I did here to lift the egg shape with the clear window higher than the "scene."

Tip: I found the flowers behind the egg in the parking lot of Michaels. I always watch the ground as I walk in and out of that store. It's amazing how many pieces of silk arrangements drop to the parking lot. So, I'm being thrifty, green and I'm helping keep the world free of trash!

SECOND INSIDE PANEL

I put a strip of mesh across the bottom of the panel, then I added the running bunny art that I hand-colored. (You can get a copy by emailing me at SaveTales @aol.com) I added a piece of contrasting patterned paper, a cut-out of a design on a piece of patterned paper, and the "Cute" button.

Tip: Sometimes paper will have shading on the edges. If you cut it into a smaller piece, there will be shading on two sides, but not on your new cuts. So...you can distress the edges by sanding them lightly or use chalk or ink to color all four edges. Never let the way your supplies come dictate how you use them. You're the artist here.


THIRD INSIDE PANEL
This is sooooooo green. Not only did I use a piece of green paper, but...that silver embellishment on the lower right? It's the lid off a frozen juice can. Inside is the 2" circle I punched from the egg on the FIRST INSIDE PANEL. The outside rim is a scalloped circular punch. The images inside are a rubber stamp of a basket of flowers ( Stampin' Up) that I hand-colored, and a punch of a bunny which I raised with Pop-Dots. I filled the depressed circle inside with glitter glue.
Tip: Layer the glitter glue inside. First squirt in a ring of glue. Let it dry. Add another layer. This gives better thickness and coverage than one pass.
The "button" is Martha Steward punch of a button. (There are so many times when you don't have JUST the right button, and this punch--though pricey!--allows you to create a customized button that's perfect.) I layered the faux button over two flowers I punched out.
FOURTH OUTSIDE PANEL
First I trimmed a piece of laser-cut paper. Remember, this paper will need special attention from you--you have to be sure to dab a little glue under the pieces so they don't stick out and get torn off. I added a big die cut of a bunny. The Easter Eggs embellishment I made with the clip art from Microsoft Word. To the eggs and to the bunny's eye I added blue glitter glue. The backdrop for the embellishment is that circular scalloped-edge punch.
Tip: Very carefully dot glitter glue onto the scallops. But first, squirt out a little glue to get out any bubbles. Keep a toothpick close at hand and a cotton-tip swab so you can "correct" any dots that are mis-shapened.
FINAL NOTES
Tying ribbons to the circular rings helps stabilize the whole project when it's standing up. You could use tie all the panels together with ribbons, but this seemed more sturdy. Be careful that you don't locate your holes (which you must punch--forgot to tell you that!) too close to the edges or too far from the edges of your panels. If they are too close, they could pull loose. If they are too far, the rings won't fit.
ENJOY! Happy Easter! If you see someone wandering the parking lot of your neighborhood craft store, tell her "Hi." It's probably me!
PS Don't forget to click on the FOLLOW icon to the right. Otherwise you won't know when I post a new project.

Easter Album


This is a cute place to store your Easter or Spring photos. The four panels were cut from empty cereal boxes. Each piece of chipboard (cardstock) is 7 1/2" by 6" so you'll need two empty boxes. After you cut your panels to size, sand the printed surface off of the outside of the box. This makes it easier to glue down your paper.

Tip: I wear a kitchen apron when I sand. Those bits of paper and dust get all over your clothes.

Once you have the four panels, you'll also need six 1" diameter binding rings which you can buy at any office supply store, ribbons, and paper. What you choose to put on your panels is up to you, but I'll walk you through what I did.

FIRST OUTSIDE PANEL

This is a framed scene with a rabbit on the outside. If you email me at savetales@aol.com and put BUNNY in the Subject Line, I'll send you a pattern so you can cut a bunny out from fabric. The frame was made with a Sizzix die cut machine, but you could easily make your own. The inside window is 2 1/2 by 3 1/2 inches. The outside dimensions are 4 by 5 inches. Create the frame first, then cut a background paper of 4 x 5 inches. Start to decorate your background. Cut a frame of foam core slightly smaller than your frame. Cover it with masking tape (mine is green). Assemble.

Tip: Use Pop-dots under your bunny so he doesn't collapse where his body extends over your open frame.

Tip: I strung my letter beads on wire, then curled the end of the wire around a pencil tip.

Tip: See the hole in the right hand corner? The two beads on a string act as ballast so your album can sit on a surface.

SECOND OUTSIDE PANEL

Cover your panel with paper. Make your flowers:

1. Either stamp letters or numbers onto patterned paper or print letters and numbers onto patterned paper.
2. Punch out the flowers.
3. Add buttons.
4. Cut curved pieces of green paper for stems.

The bunny is a rubber stamp by PSX by the name of "Baby Bunny." The picket fence is a rubber stamp by Rubber Stamps of America. Cutting out the area between the fence slats with a craft knife really gives the fence dimension.

Add decorative edged paper along the bottom to "ground" your image.

Tip: Grounding an image keeps stuff from looking like you just threw it on your page/card.


THIRD OUTSIDE PANEL
This is actually a small album. If you use the inside cover and the panel beneath the small album, you can add ten photos to this standing project. I keep really cheap albums on hand just for this. I pulled the four inside sleeves out of the album (which costs about $1.99 and can be found at Walmart or the dollar store). I created a cover larger than my inside pages PLUS 1"extra at the top. I folded over that 1" at the top and stapled my inside sleeves to the back of that extra flap. Then I decorated the cover. This is a neat trick that allows you to ALWAYS get more photos on a project for nearly next to nothing price-wise.
FOURTH OUTSIDE PANEL
Another framed Easter scene. I used my Sizzix to cut the oval out of the center of a solid piece of Bazzill Basics 4 3/4 inches wide by 5 3/4 inches tall. I then cut a background bigger than the oval hole. I layered egg stickers and other cut outs. The images of the chicks I scanned from an old children's book of mine. And I tucked silk flowers under a sticker of a decorated egg.
Tip: The silk flowers here were "magpie" items. That means, I found them in the parking lot of Michaels! I always look down as I walk in and out of that store!
Okay, on to the INSIDE PANELS!

Some Bunny to Love Card

This is a fun and easy card! (I think that if cards are too complicated, you just want to give up and go buy them...) To get the "running bunny" send me an email at savetales@aol.com and put BUNNY in the Subject Line. I'll send you a file you can download and print of this bunny that I created. (It's not for commercial use, please. Just for you to use and enjoy.)

I opened a file and sized it to the width of my card in Microsoft Word. Next, I used the "word art" function in Microsoft Word to print and curve "I want some bunny to love!" in the font called "Leftovers." Do be careful, though, because sometimes Leftovers tends to smush punctuation too close to the letters. I had to add a space for the exclamation point. Then I printed out my words in brown on my patterned paper.

Tip: Small patterns are best for printing words onto. Boldface and large clear type will show up best.

I trimmed the sides of the paper using decorative edge scissors.

Tip: Draw an outline of where you want to cut and give yourself wide margins. The decorative scissors can sometimes chew up the paper if you cut too close to the edges.

I added the purple rickrack.

Tip: There's no purple in the patterned paper. Sometimes you have to try different combinations by holding your pieces up together. The purple worked and it matched the mood of the card.

And finally, I added the brown "handstitching" lines around the outside border.

Like this? Be sure to click the "FOLLOW" icon so you don't miss any project ideas or special offers or contests!